 Running a small business as a creative person is like a baby giraffe walking across a log, over the rapids, in heels – it’s unnatural, precarious, immensely comical, yet totally possible. Figuring out how to pay yourself and others to do something we would normally do for free is so challenging, and the learning curve is high.
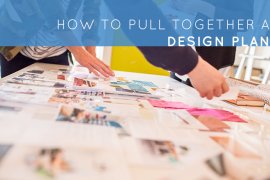
But, one thing we do know over here is how pull together a design plan – for your home, office, studio, conference room, store, dressing room, etc, no matter what your project or business is. Trying to get employees to be excited, to work hard, to come up with new ideas, and the biggest ‘get’ of all, TO CARE in a really stale and uninspiring office space is extremely difficult. I should know, we used to work in one.
So, today we are going to walk you through our design process; how we go from the blank (or uninspiring) ‘before’ space, to a real design plan for that space. We partnered with Epson to create a video about the process, and just telling you the steps seemed boring, so we instead made it a one day challenge. It’s like an episode of 24 over here. We all know that each design plan takes days, if not weeks (or months) to produce, but that would be a very long blog post. So watch the video to see what happens then keep on scrolling:
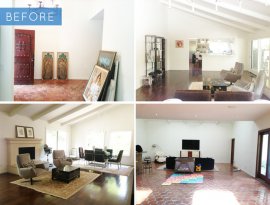
For this project we’ll use our client, we’ll call her Kate, because that is her real name. Here’s her space before we got there:
 First we take measurements, ask lots of style and color questions, then (once the contracts are signed) we get on it and the fun begins.
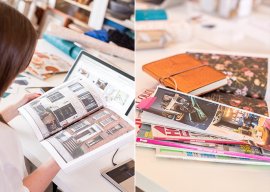
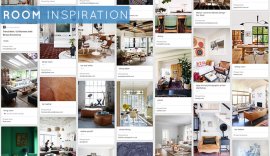
Step one: Find Inspiration. After you have determined what space you are going to design, you’ll want to find some inspirational images to help guide you. This may sound super laymen and obvious to a lot of you, but the first thing we do after we see the space is troll the internet, magazines, Pinterest and design books (vintage and new) for aspirational versions of what that space could be. This is both for look, feel, and practicality.
We tear out pages from magazines (or scan/photo copy them) and print out our Pinterest pages. Since we have to do this often, we have a shared digital cloud file for each client, but you could just put them all into a folder on your desktop (either drag and drop from Pinterest or screenshot by hitting command/shift/4 at the same time then the mouse pops up and you can take a photo of whatever you want on your screen), or print everything out and put it in a binder. These days you can put everything on your ipad, but I’m a big fan of the binder because you can scribble all over it (especially when you are working with a client).
Then we stare at all the inspirational images and look for the common threads – maybe it’s a color palette, maybe it’s a feeling, maybe it’s the style of the furniture or the pops of randomness. Ideas start forming from there, although nothing is really solid yet.
For clients, we don’t just find colors on the color wheel or even a paint fan deck, we find them in and on textures to help really explain how the color will play out (at least in our fantasy). So it’s not just ‘white’, it’s a shot of beautiful white linen sheets. Obviously if you are designing your office space and you haven’t designed anything before you don’t need to take this step, but I figured it would be fun to show you what we show clients and how we romance them a little bit.
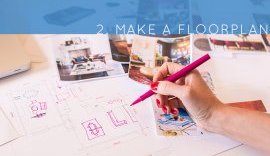
After you have a general idea of where stylistically you are headed, then it’s time for step 2: Make the floorplan.
 As a stylist, I NEVER made floorplans, mainly because it didn’t matter if things didn’t fit; you would just cheat the camera so they looked like they fit. But now we actually have to care about the right scale, because if the sofa is so big that you can’t open the door, then it’s an actual problem and we’ll look like hacks.
If you are new to this whole thing and don’t have or want to take the time to do some fancy renderings, then simply tape out your furniture shape and location on the floor. Standard sofas are 72″, 84″, or 96″ long with lots of different depths (typically around 30 – 40″). So when you are in the room, tape the approximate shape/size of the sofa on the floor and then you can play with the perfect size and location for that space.
We do our renderings in Vectorworks and Ginny normally does one of the ‘Existing floorplan’ and then we create what we think will be a better floorplan with the right amount, type and scale of furniture. Here is her existing floorplan:
Here is our proposed floorplan:
This is mainly for all the major pieces of furniture. You tend to not put lighting or accessories on the plan, but having this guides you and tells you what you actually need and what size you need it.
Now it’s time to start pulling the whole plan together.
This sounds kinda abstract, and I’m sure you’re thinking ‘aren’t your thoughts always organized?’ Nope. Up to this point we know the style, the color, the inspiration, and what major pieces we need, but it’s time for the two two tasks to merge. So we take the floorplan and basically list out everything we need and start to look for specific items in our styles/colors.


RELATED VIDEO

RELATED FACTS
-
 A blueprint is a type of paper-based reproduction usually of a technical drawing, documenting an architecture or an engineering design. More generally, the term "blueprint" has come to be used to refer to any detailed plan.
Various base materials have been used for...
Share this Post
latest post
-
 Helpful October 4, 2022
 -
 FAQ October 4, 2022
 -
 Reference Guide October 4, 2022
 -
 Guidebook October 4, 2022
 -
 Reference Book September 1, 2022
 -
 Manual September 1, 2022
 -
 Handbook September 1, 2022
 -
 Resources August 24, 2022
 -
 Software architecture and Design Patterns June 14, 2022